[React] Event
생활코딩의 [React] 를 학습하고 정리한 글입니다.
일부 이미지는 영상의 이미지를 캡처하였습니다.
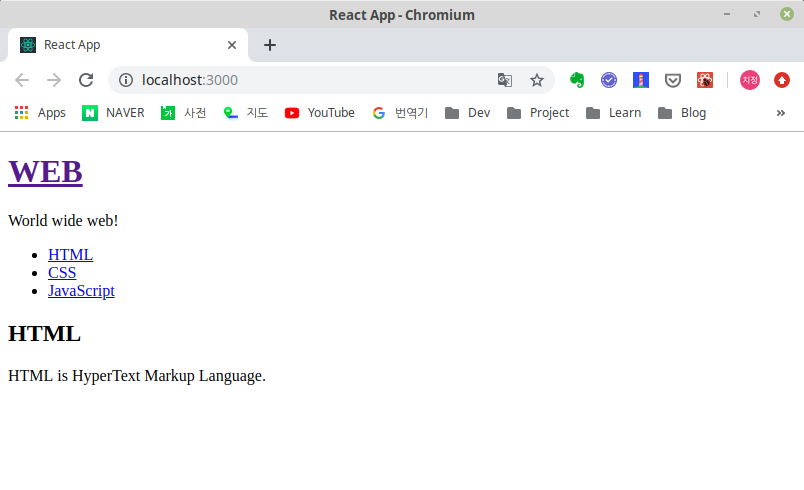
이전에 만들었던 화면에서 WEB 이나 HTML, CSS, JavaScript 를 클릭하면
아래의 내용이 달라지도록 하고 싶다.

step1
/src/components/Subject.js
...
<h1><a href="/">{this.props.title}</a></h1>
...
render 함수는 화면을 그려주는 함수이다
props, state가 변경되면 render 함수는 다시 호출된다.
App.js를 다음과 같이 변경해주자.
/src/App.js
import React, { Component } from 'react';
import Subject from './components/Subject';
import TOC from './components/TOC';
import Content from './components/Content';
import './App.css';

class App extends Component {
  constructor(props){
    super(props);
    this.state = {
      mode:'read',
      subject:{title:'WEB', sub:'World wide web!'},
      welcome:{title:'Welcome', desc:'Hello, React!'},
      contents:[
        {id:1, title:'HTML', desc:'HTML is for information'},
        {id:2, title:'CSS', desc:'CSS is for design'},
        {id:3, title:'JavaScript', desc:'JavaScript is for interactive'},
      ]
    }
  }
  render() {
    var _title, _desc = null;
    if(this.state.mode === 'welcome'){
      _title = this.state.welcome.title;
      _desc = this.state.welcome.desc;
    } else if(this.state.mode === 'read'){
      _title = this.state.contents[0].title;
      _desc = this.state.contents[0].desc;
    }
    return (
      <div className="App">
        <Subject
          title={this.state.subject.title}
          sub={this.state.subject.sub}>
        </Subject>
        <TOC data={this.state.contents}></TOC>
        <Content title={_title} desc={_desc}></Content>
      </div>
    );
  }
}

export default App;
mode의 값을 변경해주면 Content의 값이 변경되는것을 확인할 수 있다.
step2
이제 mode의 값을 직접 수정하지 않고 클릭했을때 변화를 주고 싶다.
우선 분리개발이 아닌 한 파일에서 수정하도록 코드를 다음과 같이 수정한다.
/src/App.js
...
        {/* <Subject
          title={this.state.subject.title}
          sub={this.state.subject.sub}>
        </Subject> */}
        <header>
            <h1><a href="/" onClick={function(){
              alert('hi');
            }}>{this.state.subject.title}</a></h1>
            {this.state.subject.sub}
        </header>
...
위와같이 만들고 alert 에서 ok를 누르면 relode 된다.
onClick 등 함수에 사용한 첫번째 인자로 event 를 주입해주게 만들어졌다.
preventDefault()는 태그가 가진 기본적인 동작들을 막는 함수이다.
다음과 같이 코드를 수정하면 더이상 새로고침이 되지 않는다.
/src/App.js
...
        <header>
            <h1><a href="/" onClick={function(e){
              console.log(e);
              e.preventDefault();
              alert('hi');
            }}>{this.state.subject.title}</a></h1>
            {this.state.subject.sub}
        </header>
...
step3-1
이제 onClick에서 mode 값만 변경해주면 되는것이 아닌가?!
/src/App.js
...
        <header>
            <h1><a href="/" onClick={function(e){
              console.log(e);
              e.preventDefault();
              this.state.mode = 'welcome'; // 1
            }}>{this.state.subject.title}</a></h1>
            {this.state.subject.sub}
        </header>
...
아니다.. 에러 발생!
TypeError: Cannot read property 'state' of undefined
1 의 this 는 state 를 갖고있지 않다.
일단 React의 사용 설명대로 다음과 같이 결과 값을 확인해보자.
/src/App.js
...
        <header>
            <h1><a href="/" onClick={function(e){
              console.log(e);
              e.preventDefault();
              // this.state.mode = 'welcome';
              this.setState({
                mode:'welcome'
              });
            }.bind(this)}>{this.state.subject.title}</a></h1>
            {this.state.subject.sub}
        </header>
...
step3-2
왜 위와 같이 했는지 알아보자.
bind 함수는 this의 값을 인자값으로 받은 객체로 바꿔준다.
첫번째로 render() 안에서의 this는 컴포넌트 자신을 가리킨다.
예를들면 App.js 의 render() 함수안에서 this는 App이다.
/src/App.js
...
render() {
    ...
    console.log('render', this);
    ...
  }
...
// render App {props: {…}, context: {…}, refs: {…}, updater: {…}, state: {…}, …}
따라서 onClick 안에서 this 값을 App으로 변경해준 것이다.
두번째로 React는 JavaScript가 아니다.
그렇기 때문에 다음 코드를 사용하면 React는 state 값의 변화를 알아차리지 못한다.
// this.state.mode = 'welcome';따라서, setState 를 사용하여 state 값 변화를 React에 알려줘야한다.
step4
이벤트의 생성자가 되어보자.
App.js 에서 우리가 정의한 onChangePage를 Subject.js 에 전달하자.
/src/App.js
...
        <Subject
          title={this.state.subject.title}
          sub={this.state.subject.sub}
          onChangePage={function(){
            this.setState({mode:'welcome'});
          }.bind(this)}
        >
        </Subject>
...
Subject.js 에서는 onClick 에서 bind 를 통해 this 값을 Subject로 바꿔준다.
그러면 App.js 에서 props 로 전달한 onChangePage 를 사용할 수 있다.
/src/components/Subject.js
...
  render(){
    console.log('Subject render');
    return(
        <header>
            <h1><a href="/" onClick={function(e){
              e.preventDefault();
              this.props.onChangePage();
            }.bind(this)}>{this.props.title}</a></h1>
            {this.props.sub}
        </header>
    );
  }
...
step5
마찬가지로 TOC 에도 새로운 이벤트를 작성해보자.
/src/App.js
import React, { Component } from 'react';
import Subject from './components/Subject';
import TOC from './components/TOC';
import Content from './components/Content';
import './App.css';

class App extends Component {
  constructor(props){
    super(props);
    this.state = {
      mode:'read',
      selected_content_id:2, // 1
      subject:{title:'WEB', sub:'World wide web!'},
      welcome:{title:'Welcome', desc:'Hello, React!'},
      contents:[
        {id:1, title:'HTML', desc:'HTML is for information'},
        {id:2, title:'CSS', desc:'CSS is for design'},
        {id:3, title:'JavaScript', desc:'JavaScript is for interactive'},
      ]
    }
  }
  render() {
    console.log('App render');
    var _title, _desc = null;
    if(this.state.mode === 'welcome'){
      _title = this.state.welcome.title;
      _desc = this.state.welcome.desc;
    } else if(this.state.mode === 'read'){ // 2
      var i = 0;
      while(i < this.state.contents.length){
        var data = this.state.contents[i];
        if(data.id === this.state.selected_content_id){
          _title = data.title;
          _desc = data.desc;
          break;
        }
        i++;
      }
    }
    console.log('render', this);
    return (
      <div className="App">
        <Subject
          title={this.state.subject.title}
          sub={this.state.subject.sub}
          onChangePage={function(){
            this.setState({mode:'welcome'});
          }.bind(this)}
        >
        </Subject>
        <TOC
          onChangePage={function(id){ // 3
            this.setState({
              mode:'read',
              selected_content_id:Number(id)
            });
          }.bind(this)}
          data={this.state.contents}
        ></TOC>
        <Content title={_title} desc={_desc}></Content>
      </div>
    );
  }
}

export default App;
1 은 선택한 콘텐츠의 아이디가 저장될 변수이다.
2 는 어떤 메뉴를 선택했는지에 따라 props로 어떤 값을 전달할지 정해주는 역할이다.
break 는 조건이 만족했을때 더 이상 반복하지 않는다.
3 은onChangePage 라는 사용자 임의 이벤트를 만들었다.
/src/components/TOC.js
import React, { Component } from 'react';

class TOC extends Component {
  render(){
    console.log('Toc render');
    var lists = [];
    var data = this.props.data;
    var i = 0;
    while(i < data.length){
      lists.push(
        <li key={data[i].id}>
          <a
            href={'/content/'+data[i].id}
            data-id={data[i].id}
            onClick={function(e){
              e.preventDefault();
              this.props.onChangePage(e.target.dataset.id);
            }.bind(this)}
          >{data[i].title}</a> // 1
        </li>)
      i++;
    }
    return(
        <nav>
            <ul>
                {lists}
            </ul>
        </nav>
    );
  }
}

export default TOC;
각 생성된 li 태그마다 dataset 속성으로 각각의 아이디를 저장하고 있다.
이렇게 저장된 아이디를 이벤트가 발생된 태그의 속성을 담고있는 target 속성을 사용해 아이디를 전달한다.
아래와 같이 bind 에 인자를 넣어 전달하는 방법도 있다.
/src/components/TOC.js
import React, { Component } from 'react';

class TOC extends Component {
  render(){
    console.log('Toc render');
    var lists = [];
    var data = this.props.data;
    var i = 0;
    while(i < data.length){
      lists.push(
        <li key={data[i].id}>
          <a
            href={'/content/'+data[i].id}
            onClick={function(id, e){
              e.preventDefault();
              this.props.onChangePage(id);
            }.bind(this, data[i].id)}
          >{data[i].title}</a>
        </li>)
      i++;
    }
    return(
        <nav>
            <ul>
                {lists}
            </ul>
        </nav>
    );
  }
}

export default TOC;
'React' 카테고리의 다른 글
| [React] Developer Tools (0) | 2019.12.05 |
|---|---|
| [React] State (0) | 2019.12.03 |
| [React] 컴포넌트 제작 그리고 Props (0) | 2019.12.02 |
| [React] 개념 및 개발환경 구축 (0) | 2019.12.01 |